Sanity Lost!


Something took control of my weak sanity. After getting my first O’Keefe & Merritt (OKM) vintage gas stove delivered to my home, I wanted another… for a few parts. It was a great excuse to get another one. For me to restore my first OKM, Lucy, I needed to gather replacement parts; knobs, door handles, grates, clock knobs, Grillevator trays, brass valve parts, etc. I could have bought those parts separately from parts suppliers. But that would have cost a ridiculous amount more money. I lived in the San Francisco bay area, an area where people would give away OKM stoves or abandon them to the curb. I could bring a stove back home, remove the parts I needed, sell the rest on eBay. I should only need one or two parts stoves. Good plan! Yup. That’s what I’ll do. Yeah, sure. 😉
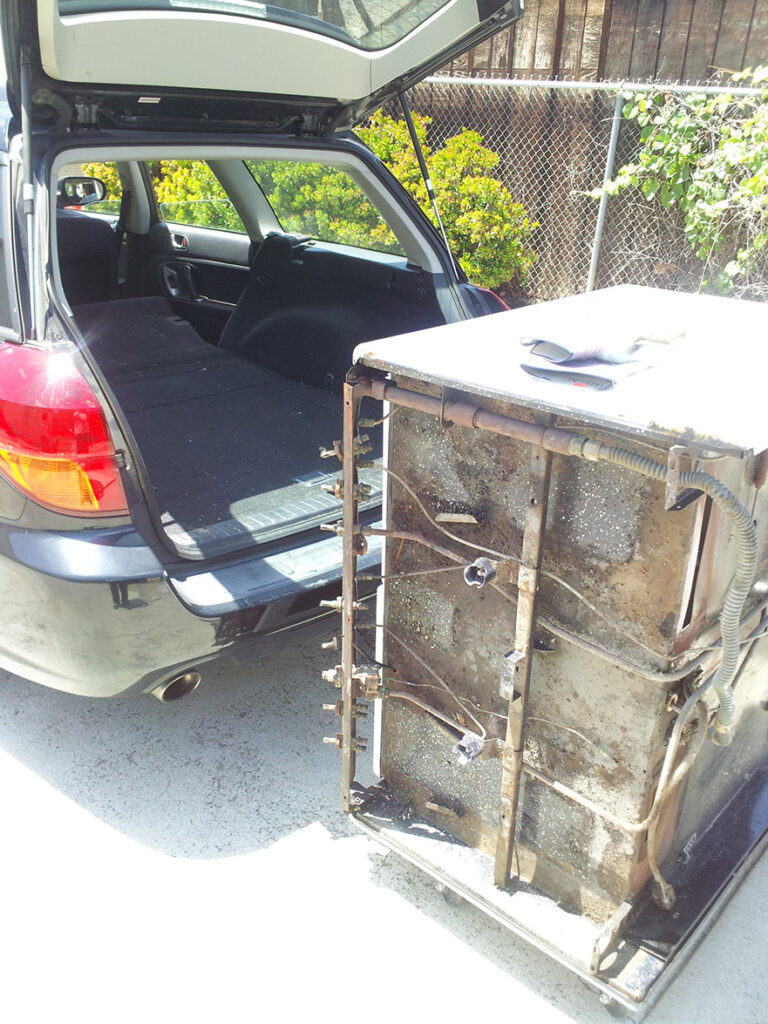
There were a couple/few practicalities. How to transport major appliance. Rent a van? Buy a hitch and rent a trailer? I did have a 2005 Subaru Legacy wagon. It had a nice sized cargo area. Would it fit? I had to thank one guy who gave me his father’s OKM. He had partially disassembled it. Not sure the entire stove’s bulk would fit, I decided to make two round trips. During my first pickup trip, we loaded up my car with all the loose bits. I returned the next day. He looked at car. He looked at the stove and said, “I think it’ll fit.”
He was right! A little adjusting, a little shimmying, removing a couple of layers of car floor padding , laying the stove on it’s back, and sliding it in, side first, it fit! The stove fit literally like a glove. Thus, began an extremely bizarre and unexpected turn in my life – rescuing mostly free vintage O’Keefe & Merritt gas cookstoves from throughout the bay area and bringing them home to San Jose, CA.
On average, about once a month someone would post a free or extremely low cost OKM stove on craigslist that was within a 60 mile radius. I’d focus on the ones that looked to be in fair to excellent shape. I could not stand to see those fine appliances scrapped. I’d also focus on the ones where the seller would repost their stove at an decreasing price, like from $300 to $200 to $100 to $50). That was the time to pounce! 🙂
From my perspective, people were actually throwing away high quality American made stoves that could last another 50 – 70 years. During my first few rescues, I verified that was the owners’ true wishes. I asked if they realized how wonderful their appliance was. It became clear they had made up their minds.
I had to save those stoves! But with no money to buy, I had to let sellers know I’d prevent their stoves from being scrapped. That seemed to work very well.
Because those wonderful vintage 40″ wide babies needed some disassembly to fit into my little 2005 subie station wagon, I needed to learn a bit about those stoves, screw by screw, burner by burner, knob by knob. 🙂 There was nothing online. I had to do this on my own.
The most important thing I learned is, not counting the chassis, nearly everything that goes into the gas stove is attached with screws, bolts and hinges. Simply attached – simply detached. There were exceptions, like the burner control knobs, which are friction fitted. Another exception were the gas assembly tubes. They link the Alltrol gas valves to the cooktop burners. They are heavy cast iron and simply lay in place. (And I won’t go into detail about how long it took me to realize that!)
The Breakdown Tool List
Disassembly required some tools and supplies. Oh, and a smartphone camera to take some breakdown photos🙂
| bags, boxes for small parts | mini pry bars |
| black marker (Sharpie) | paper towels |
| drivers, blade and Phillips | propane torch |
| electric drill (w reverse) | 3′ x 6′ ramp (handle at least 600lbs) |
| flat furniture dolly | tie-down straps, heavy duty |
| furniture moving blankets | trash bag |
| hand broom | Tri-flow penetrating lube |
| hand cleaner | vise grips |
| large cardboard boxes | wire cutters |
| work gloves | wrench set (American) |
| masking/duct tape |
The Breakdown
The best part, at the beginning of each extraction, was seeing the expression on the faces of the folks who thought something was screwy. They insisted burly men and a truck were needed to move the stove. Instead, a strange middle aged, very excited woman shows up alone with a little subie wagon and assures them she’ll handle everything by herself.
How you prepare an OKM for transportation depends on what you’re transporting it in. I had to do the extreme version, get the stove as light and as small as possible to fit into my Subie on its back. You may not have to go as far. Don’t rely on memory unless you have a photographic one. Take lots of photos as you go. You’ll need them!
Stage 1: Take away the easy stuff. If you can keep the stove upright, you don’t have to do too much. But make sure nothing can rattle and bang against other parts of the stove.
- grates
- oven racks
- crumb trays
- salt/pepper shakers
- light bulbs (s)
- toe kick panel
- all the dials (knobs)
- if the stove has the three cooktop panels, remove those or strap them down tight
- griddle (if your stove has one)
- I’d remove the door and drawer pulls (but that’s me)
- if the stove has a vanishing shelf cover, add a cushion, like cardboard between the cooktop and the cover, then strap them down tight.
- wrap or strap the doors and drawers so they don’t open during transport
- if you don’t mind using that furniture plastic wrap, wrap the stove instead of strapping it.
- Bottom line: anything that’s loose, opens/closes, anything made of plastic should be secured in some way.
Stage 2:
- Remove the burner assemblies (those big heavy black pipes with the burner heads attached. Those are simply resting inside the stove, so they can be lifted up and out.
- Check to see how tight or loose the oven burner is. Some won’t budge, others might be pretty loose and bounce around when going over rough roads.
Here was a typical stove rescue for me.


The Loading
I tilted the stove onto a flat furniture dolly, rolled it over to the car rear, tilted onto ramp, covered with cardboard or moving blankets, and carefully pushed it into the car.
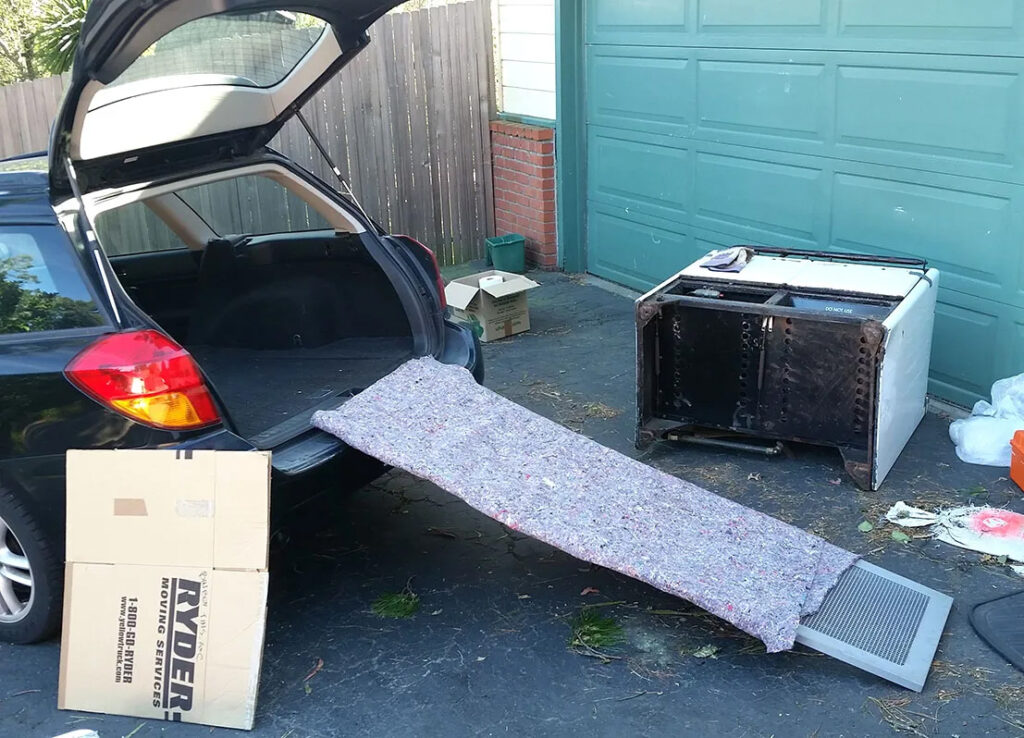


Then I packed all the parts in wherever they could fit and still be able to close all the doors.
I was giddy and laughed all the way home, with my treasure. 😀
Too much of a good thing?

Was fate in my favor? A few years before discovering OKMs, I purchased some property; a big house that came with its own parking lot and out buildings, including a three car garage. I had no idea I’d be filling up that garage with vintage gas stoves. Then filling up the parking lot with the extras.