
Here are a few things I figured out about my O’Keefe & Merritt gas stove. My gas stove is basically an organized collection of pipes, valves, burners and a small chamber or two for baking/broiling. Combustible gas flows thru the pipes, its progress thru the pipes is controlled by valves. When the gas reaches the burners at the end of those pipes it can flow out into the air unless it’s ignited.
OK. It gets a little more complicated than that, but if you grasp that basic pipes and valves thing, most everything else becomes less mysterious.
Until a few years ago (2013), how a gas stove worked was a total mystery to me. I got the fire/flames part. I learned how to use my grandmother’s Roper gas stove when I was young. I’d always wanted one for cooking and baking. Once I bought my first house, it was time to fulfill that dream. The concept of rapid response heat control was extremely appealing.
Due to cost restraints, I resorted to looking at used stoves. O’Keefe & Merritts (OKMs) were most common in my area (northern California), so I bought a nice looking one in my neighborhood that was listed in craigslist. At the time, I had no idea what an OKM was, but it looked vintage-cool. I learned, later, it was built in 1953. Was that good or bad? I dunno.
Being totally ignorant about buying used appliances, I assumed it was fully operational, you know, like buying a new appliance. Big mistake on my part.
One additional challenge was the lack of competent maintenance manuals for vintage stoves. I was going to have to learn how to repair and maintain my stove by trial and error.
I was in for some awesome puzzle solving fun!
I’d learn bits and pieces from PG&E gas techs, an extraordinary master plumber who also knew about gas plumbing, one local small business kick-ass appliance repair shop and snippets of vintage stove info I could find on the web.
However, the best best features of vintage stoves were quality, durability, reliability. Unlike the garbage made today, vintage stoves were built to last generations. Manufacturers strove to make those appliances of high quality and make them repairable. Imagine that! Today, appliances are made to be disposed after a few years.
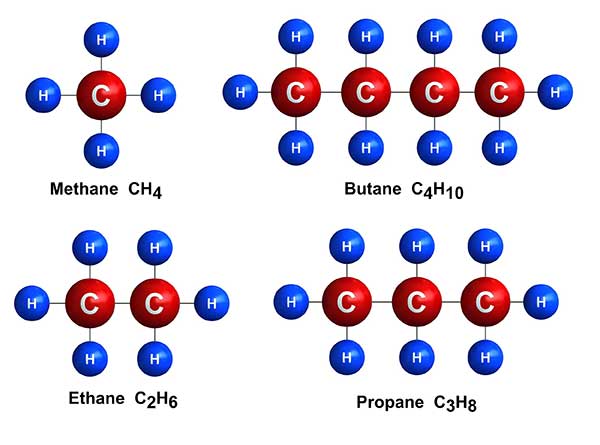

OK, back on topic. Gas stoves, I learned, can burn natural gas (mostly methane), propane gas (LPG or liquefied petroleum gas) or butane gas. They are the most common hydrocarbon gases used. Those gases vary in characteristics like potency, whether they are lighter or heavier than air, their boiling point. They can be stored in gaseous or liquid form, depending on how much they are pressurized. Gas stoves can burn those gases if they are properly designed and configured per gas type.
My first OKM was configured to burn natural gas. I lived in a natural gas delivery grid, common in most metro areas, so hooking it up was simple, to be done by a plumber, since the house was already plumbed for gas. The plumber added a new shutoff valve and a new flexible gas hose. He checked to make sure the cooktop burners lit and that there were no obvious, dangerous gas leaks.
But I still had some challenges ahead and I knew of no one local who could fix them. That was OK. I wanted to learn by myself.
What did I learn? While the parts inside the stove looked wild and woolly, the basics are simple. Pressurized uncombusted gas flows into the stove thru a large pipe. It gets routed into various smaller pipes. The gas flows in those smaller pipes gated by valves. When a valve is opened, the gas flows thru a gas pipe, then mixes with some room air in a little air chamber, travels to a burner waiting, to be ignited.
That’s it! Basically. 🙂
Of course, there is a tremendous amount of precision engineering invested to make sure it can be that basic and safe for us consumers.
Where it all starts
I’ll start at the kitchen wall. My plumber attached a shutoff valve to the pipe stub coming out of the wall. It’s a very important valve that allows me to turn off the gas to the entire stove. This is great if I plan to work on my stove or I’m worried about a serious gas leak or if I replace one gas stove with another. My plumber also installed a new flexible gas hose that connected to the stove.
Don’t ask me why the main shutoff valve to the stove is typically behind the stove. My stove is a few hundred pounds; not too easy to pull out from the wall if I need to shut off the gas in a hurry! In my next gas stove installation, I plan to put another shutoff valve at the stove end of the hose.

Gas valves in the stove

Gas valves. They’re magical to me. Don’t know why. 🙂 Maybe because many are made from brass; one of my favorite metals. 🙂 One can’t operate a gas stove without them. Valves are directly connected to the manifold. They are responsible for controlling, from the manifold, the rate of gas that is sent to the burners. There are various types of valves; ones attached to knobs for the cooktop burners, small ones for the pilot burners and a special one (thermostat) for the oven/broiler.
Valves are all designed to do the same thing – control the gas flow to their respective burners. With my O’Keefe & Merritt, the pilot valves are always open which keeps all four pilots burning, as long as gas feeds the stove.
Cooktop valves and burners


My OKM has four Alltrol double valves, one for each cooktop burner. “Double” means one knob actually controls two valves; one for the big ‘doughnut’ burner and one for the little simmer burner that sit inside. The double valve can control which if the two burners gets gas and how much. With a fully restored valve, there is an audible click for each setting when the knob is turned.
When the control knob is rotated on, the valve opens, allowing gas to flow into the valve. Then the gas must pass thru the valve’s orifice, then out of the valve into a small venturi chamber where it mixes with some air, then flows thru the burner pipe(s) to the burner, where the gas can ignite.
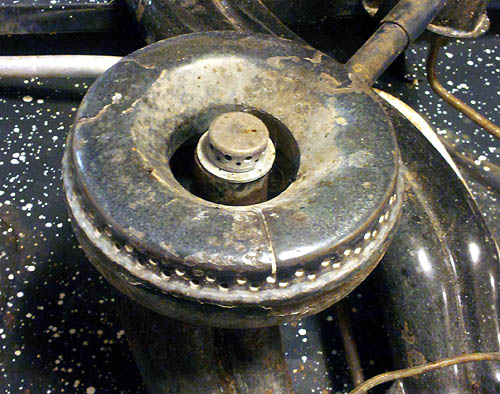
Pilot valves and burners


Standing pilots are also burners; tiny ones. And each burner has its own valve that is connected directly to the manifold. They are intended to burn 24/7, acting as a constantly burning match from which the bigger cooktop burners can ignite automatically.
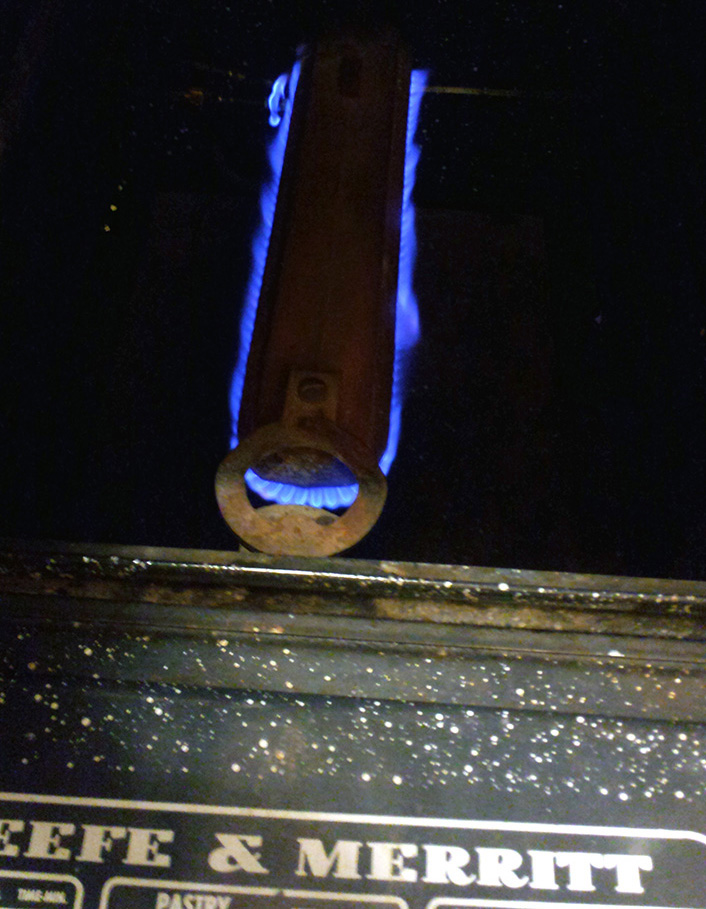
To fulfill that automatic magic, my stove’s cooktop burners are connected to the pilot burner via flash tubes. They are aptly named because you can seem a flame flash in them (in the dark).


Oven & Grillevator (broiler) valves and burners


The mighty oven thermostat – one sophisticated valve! It is also connected directly to the manifold. My stove uses a Robertshaw brand ‘BJ’ thermostat. Thermostats are special because they employ a thermometer to read the temperature in the oven chamber. When the temp in the oven reaches the setting on the dial, the thermometer signals the thermostat valve to reduce the gas flow (called bypass setting). During baking, the oven burner cycles between its highest temp setting and the bypass temperature.

The gas to my stove’s oven goes thru quite a journey to reach the oven burner. After passing through the oven thermostat control, it encounters the safety valve. If things are good, the safety valve is open and the gas can move along.


In my stove, gas then encounters a solenoid valve. That valve is controlled by my stove’s clock. With the right settings, the clock can open/close the solenoid valve. If the solenoid is open (default status), gas will finally arrive at the oven burner. If the oven pilot is lit, that flame will ignite the gas.
Misc valves
My OKM has a separate “Grillevator” broiler, with a chamber as big as the oven. But its full sized broiler is configured a little differently than its oven companion. The broiler’s burner sits at the top of the chamber instead of beneath, like the oven burner.

The valve for the broiler is a simple single valve. Unlike the oven, the dedicated broiler valve has no precision control, no bypass setting.
While my model doesn’t have one (yet), one other valve and burner set are used if the stove has a griddle.


Remember this issue about plumbing and making sure there are no leaks? Since there is a company that supplies the gas, it’s their responsibility to make sure they supply gas only to systems that can safely handle the gas. Armed with a gas detector, they can assess any situation and respond accordingly.
A challenge with plumbing is, given all the various components, linkages and joins, leaks can occur. Unlike water, we cannot see nor smell gases used by stoves. Gas makers add a smelly gas (mercaptan) to help notice if enough gas is present in the air. But it isn’t always enough. Some people can grow nose blind to that smell. More importantly, since I was going to work on my own gas stove, I wanted to know if anything I was doing would cause a gas leak without having to call the gas company and wait for a gas tech.

Thankfully, the market made handheld hydrocarbon gas detectors for consumers. Not only did that put my mind at ease about working on my stove, since my house also had a gas water heater, a vintage gas furnace and a gas fireplace, I could monitor my gas situation at anytime.
Converting to Propane
So I’ve learned quite a bit about my gas stove and a little about most gas stoves. I’ve learned enough to realize there’s still a lot to learn about them, like all the things to know and do when switching from a natural gas grid delivery system to a stand alone propane delivery tank. Converting my Lucy to burn propane is the easy part; only 11 or so valve adjustments, 10 or so air shutter adjustments, adding a regulator to the manifold. Propane is more potent than natural gas, so less gas is needed to achieve the same heat levels. Propane gas is also heavier than air.
Storing pressurized gas inside a home is frowned upon, to say the least. When a pressurized gas tank is set outside, it is subject to various temperatures and whatever weather exists. Since the gas supplier is responsible for safety (they have the expertise), chances are they will want to own the tank and will charge for that and any installation involved.
That’s my next adventure and learning opportunity.