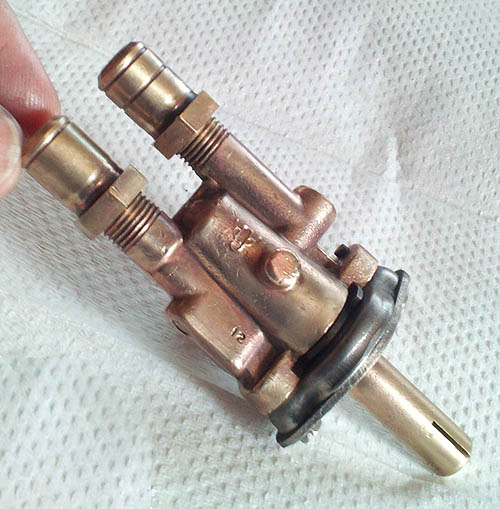
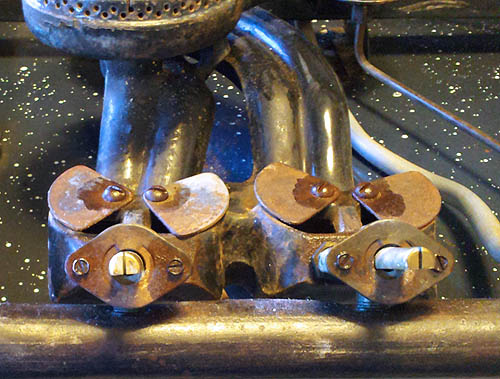
Gas valves used to control the supply of gas to both the main burner and the simmer burner are called double gas valves. Alltrol valves like the one shown below have been in all the OKM stoves I’ve seen so far.
It was months into working on my stove before I discovered the cooktop burner doohickeys that control the flow of gas to the cooktop burners were called double Alltrol valves. My stove has four.
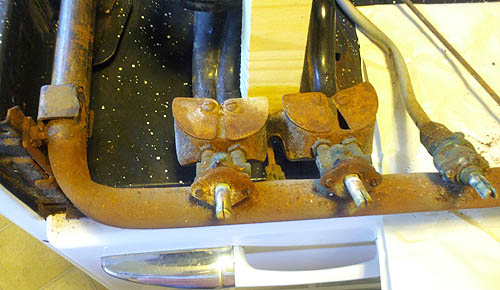
After removing the tilted ergonomic control panel from the stove front I saw many things (puzzling to me at the time) – many of the hidden controls of my stove’s cooktop; lots of curious bits and pieces. It took a while to understand what I was looking at. But it was also a fun new puzzle.
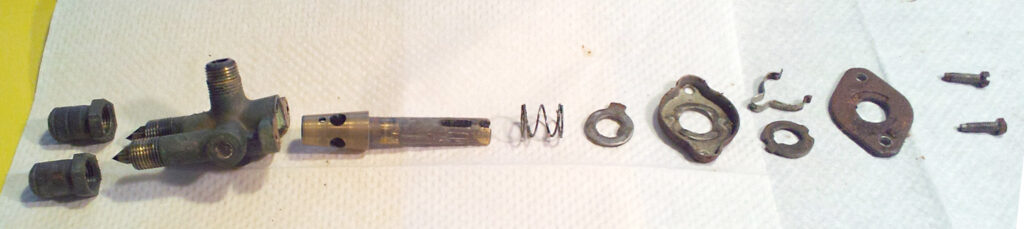
Little slotted screw heads! Cool. That means accessibility to something. I removed those two little securing screws on either side of the stem of one valve. The screws are for the kinda eye-shaped housing unit. It has a top plate and a bottom cup. Inside each housing is a ‘hairpin spring’ and ‘detent disc’.
Detent Discs and Hairpin Springs
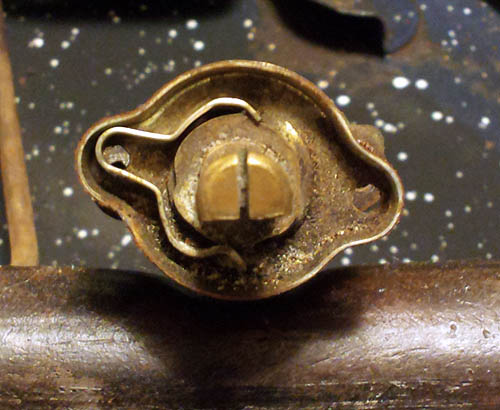
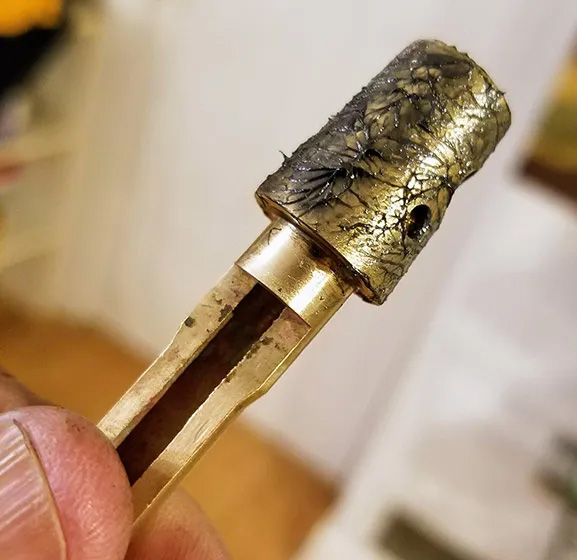
There was a lot of fine particle debris at the base. I deduced later that the debris mainly consisted of brass bits, caused by the end of broken hairpin spring scraping the disc.

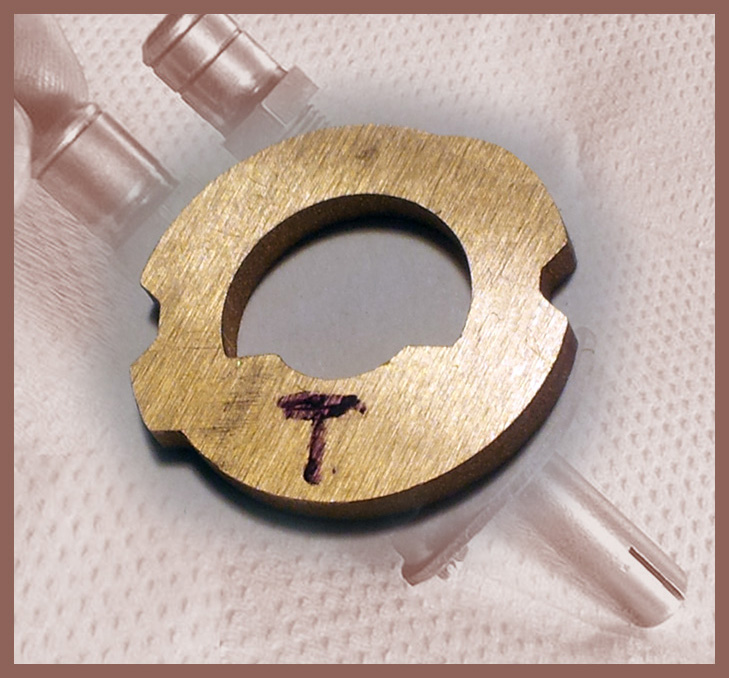
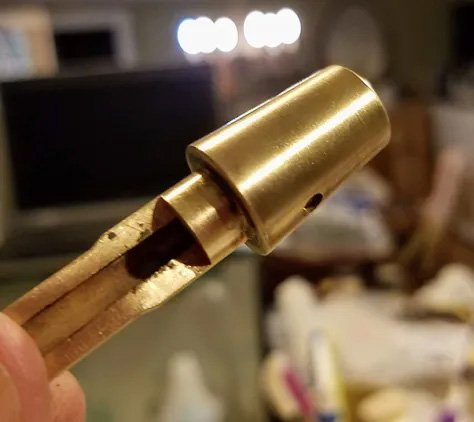
Certain O&M Alltrol valve models have brass detent discs (cams). They fit snugly around the valve stem and rotate as the valve rotates. The clicks correspond to specific flame levels in the main and simmer burners, providing useful feedback to the cook regarding specific consistent heat settings. As the disc rotates, the ends of the hairpin spring will ride the peaks and valleys of the disc and slap it (click). These clicks are referenced in the O&M gas range owner’s manual.
Over time after much turning of the valve, the steel spring wears down the brass disc. Brass is much softer than steel. Sometimes the steel spring breaks in a place that causes the spring to actually shave the detent disc which causes it to wear down faster.
I wanted to try to make a replacement brass discs. Unfortunately, I had no idea what a brand new one looks like at the time. It will be a matter of serious tedious guesswork and testing to find the right profile. Something to do later on… maybe. Wish me luck!
I did eventually find out their original profile.
No one can just buy these itsy bitsy precision parts. A metal fabrication shop or a jeweler who makes custom metal parts might be able to produce them. Otherwise, one has to buy a whole other valve and hope its innards are in better shape.
Once the housing is removed from the stem, one can see the tabbed steel washer and the coil spring underneath. I grabbed the stem and pulled the brass plug out of the plug chamber.
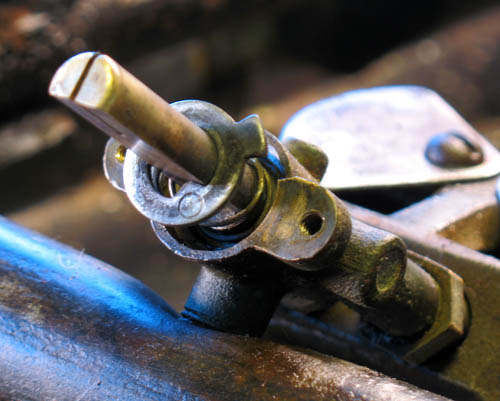
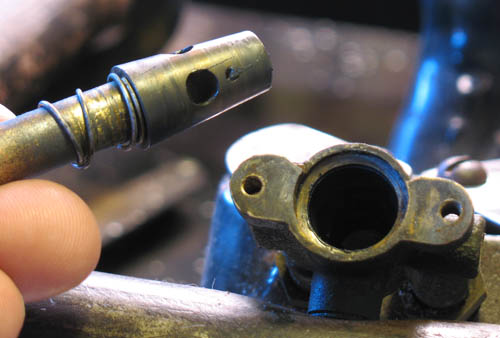
The precision construction of the brass plug and chamber is impressive. Hard metal pieces have to fit like a glove to prevent gas from escaping, even while they were rotated and under full gas line pressure.
If you disassemble this far, it’s a good idea to consider cleaning those inner surfaces and apply some fresh gas valve grease.

The plug surface is where valve grease is applied. I was told to apply the grease very sparingly. Enough needs to be applied to promote smooth rotation without clogging up the openings where the gas must flow through.