by Desiree McCrorey
This technique is a great example of a delayed reaction for me. Many years ago someone in my polymer clay guild demonstrated how to make a standard bicone bead shape using a flat top plate. It didn’t exactly click with me then as something I was interested in, but I stored the technique in the back of my brain for future reference. A year later, I tried a make a few bicones this way, but I noticed there was this pesky tendency for any pattern to start swirling. Not realizing the potential, I tried to undo the swirl!
Then one day, I decided to keep rotating, just to see what would happen. Whoa! What a way cool effect!
I’ve had so much fun with this technique, I knew it was something I wanted to share with everyone. Aside from the tons of fun you can have making these beads, it’s a great way to put a dent in the pile of scrap beads and those old canes.
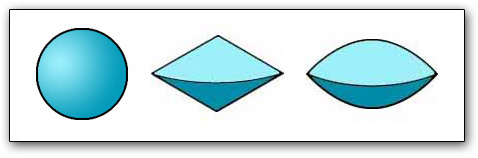
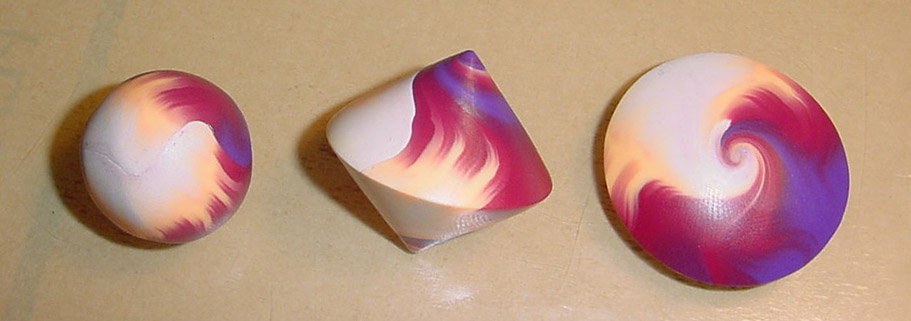
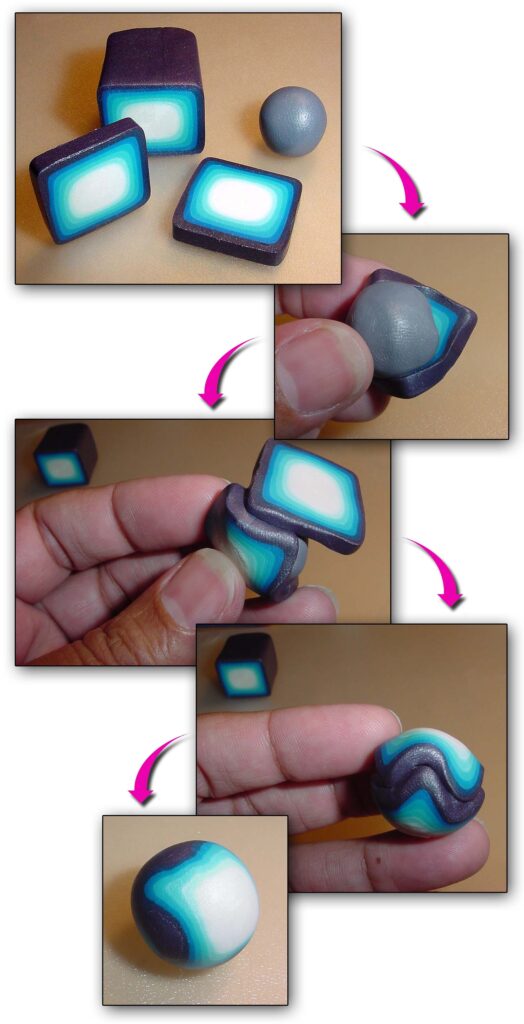
This bead has three stages. Start with a nice round ball. Easy enough. But then the most important stage is making a bicone bead shape using a flat smooth clear plate of some sort. The third and final stage is to actually round off the bicone points. This step will result in creating a lentil shaped bead.
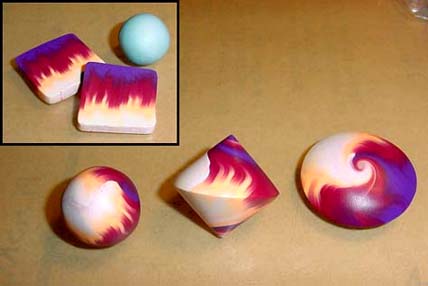
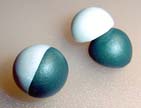
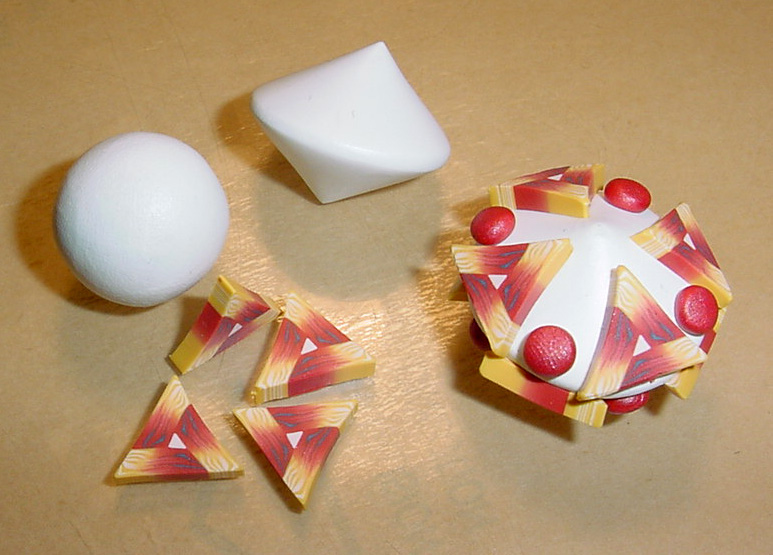
This lentil started with a scrap clay ball (pale green ball) and two thick slices from a cane.
I completely covered the scrap ball with the slices, and hand rolled until the slices melded together (lower left)
The next shape is the bicone shaped object (lower middle).
The final (lower right) is the lentil, made after slightly flattening the bicone points when rotating.
Supplies
- 7” x 9” piece of clear acrylic/plexiglass plate, approximately ¼ thick (the length and width size is my preference, yours may vary ;-), it’s important the plate be rigid and transparent
- if no acrylic/plexiglass piece is readily available, try a glass pane or a stiff audio CD jewel box;
- smooth, clean stationary work surface, a larger plexiglass rectangle will do nicely (this base cannot move while the swirling action happens on it)
- polymer clay balls (conditioned) [do online searches for various techniques](about the size of a small plum or large cherry tomato)
- polymer cane slices
- scrap clay (conditioned) [do online searches for various techniques]
Steps
1. Whether you start with a solid color or something covered with lots of decorative colors or cane slices, roll the clay until you have a nice round ball; place the ball on the work surface.
What size ball? Something about the size of a small plum, an extremely large globe grape or a nice crabapple. Ok, ok. a ball approximately 3/4″ (2cm) in diameter. 😉
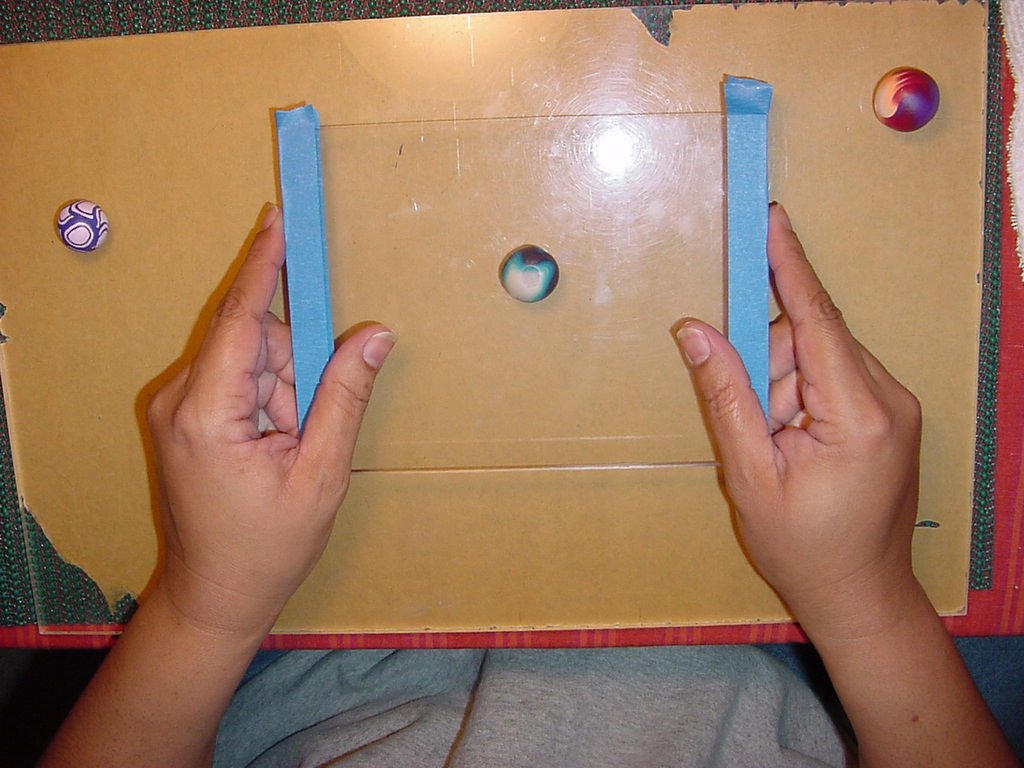
2. Grasp the clear plate in both hands as shown in the photos. Lightly rest the sides of your hands on the work surface. Extend your first fingers to hold the sides of the plate. These hand positions should help keep the plate level while you rotate it.
While holding the plate, rotate it in a circular motion… kinda like the motion when you hold a sponge to apply wax to a car. Rotate either clockwise or counterclockwise – your preference. This action will magically and gradually create the bicone shape for you!
Large circles will create a tall bicone. Small, tight circles will create a short flatter bicone.
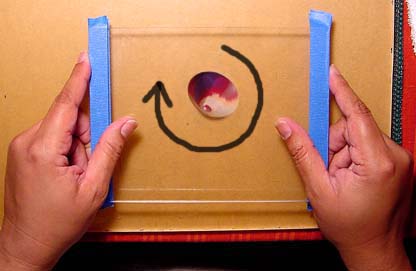
3. When the desired amount of spiral is achieved, round off the bicone points. To do that, while continuing to rotate, gradually tighten the rotations you’re doing while maneuvering the bead so the area where the pointy ends are located directly on the top and bottom; slow down the rotation speed and keep tightening the rotations until the bead shape is where you want it.
Tips
- To achieve a spiral, you’ll need to rotate the bicone anywhere from 10-120 times. Position your body, shoulders, arms, head so you can look directly down to the top of the bead (whether you’re standing or sitting). once positioned, find as comfortable a grip as possible.
- Start with squeaky clean surfaces; the work surface and the plate. Too much polymer clay residue on those surfaces hinders the swirl’s formation.
- Pick a rotation preference (clockwise or counter clockwise) and stick to that, until you can identify the behavior of what each direction will do.
- If you decide to flip the bead over, you’ll need to rotate in the opposite direction to continue the swirl in the same direction.
- When rotating, patience, relaxation, focus and steadiness are very important.
- Keep the top plate as level as possible while circulating it.
- Move in as perfect a circle as possible, oval rotation creates an oval bead. If your base surface is clear acrylic, place a printout of a large circle underneath it to help guide you.
- Make sure the clay(s) you use in the bead are consistent in firmness. If parts of the round bead vary in firmness, it will be extremely hard to keep those rotations even and to form a nice even bicone or lentil shape.
- Get the feel for applying the right amount of pressure – this one’s tricky since too little and not much spiraling happens, too much pressure and the bead gets squashed.
- If possible, have someone watch you so they can tell you if your top plate is level.

Finishing
Reaming a hole into your bead: there are no rules about whether you do this before or after baking. While it is generally easier to hole prior to baking, it’s also easier to distort the nice round edges of the lentil shape. Try both to see which method you prefer.
Common hole options:
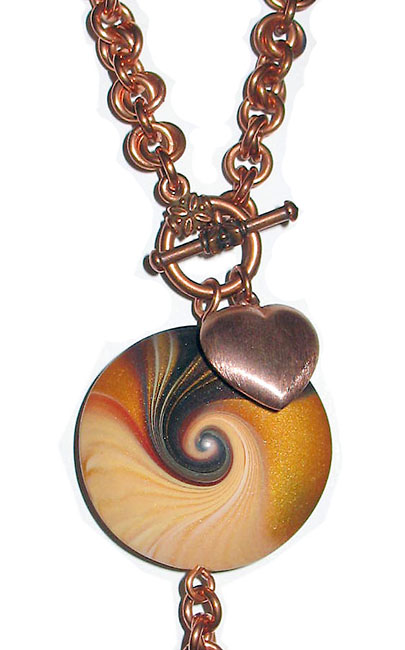
Edge to edge – centered: usually if you want to the hole to be vertical so you can wear the bead like a pendant or have a set of small lentils for a bracelet. I prefer to hole after baking so the edge isn’t distorted by the needle tool.
Edge to edge – off-center: useful if you want to wear a set of lentils as a necklace. Off center holes means the beads will be bottom heavy and not rotate while being worn. I prefer to hole after baking so the edge isn’t distorted by the needle tool.
Front to back: useful if you’re going to suspend the lentil with a nice upside down U bail.

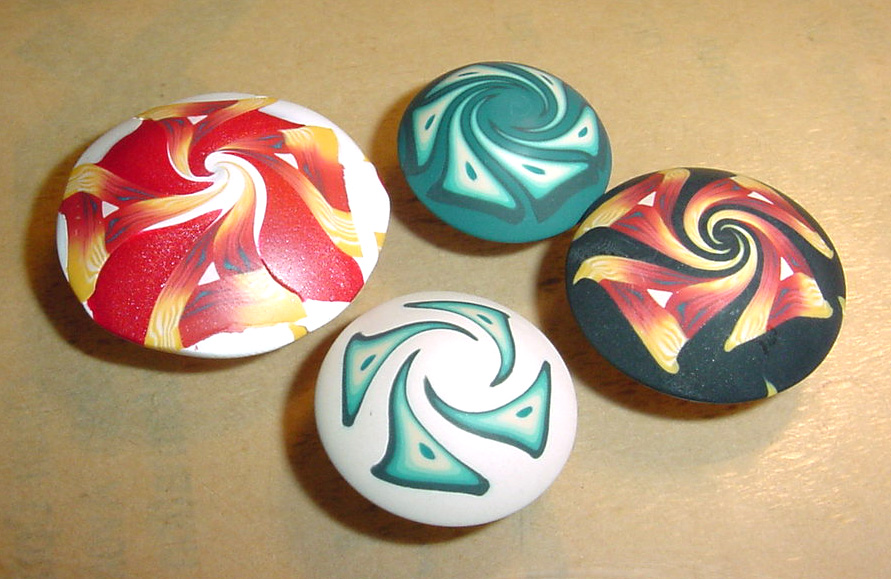
Surface Treatments
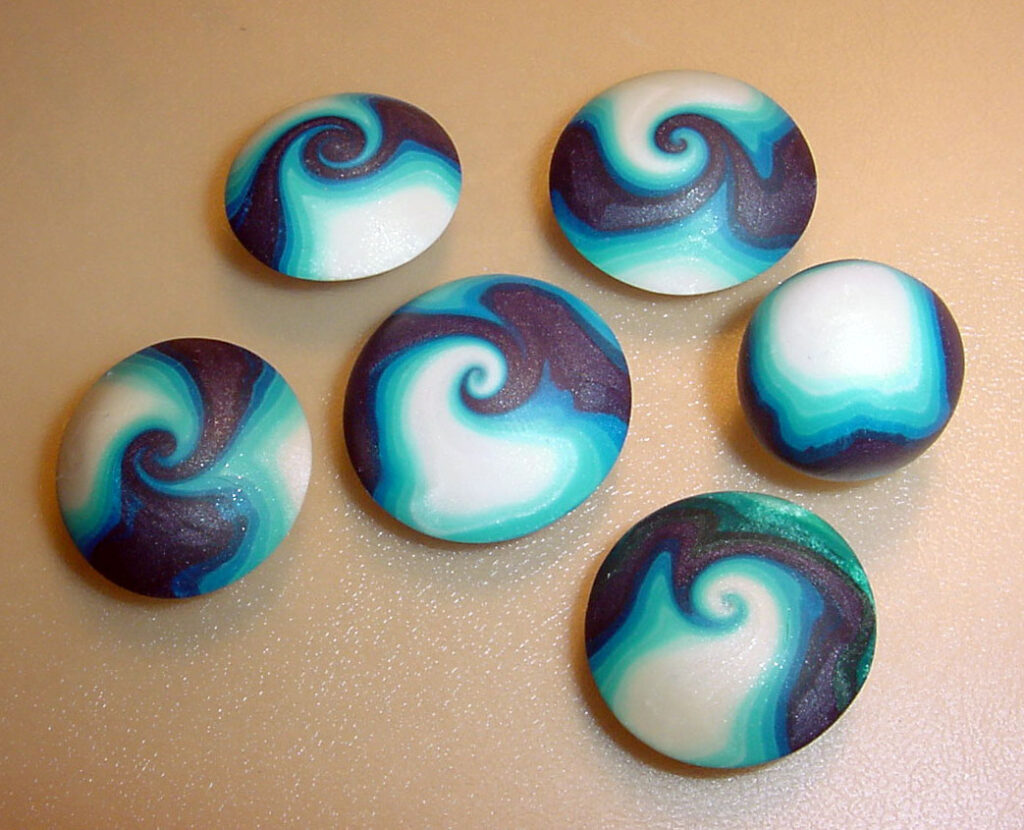
There are several options for how to finish the bead’s surface. Baked polymer clay produces a nice matte finish by default. A liquid polyurethane coating provides matte, semi-gloss and high gloss finishes. All the beads on this page were wet sanded and then buffed.
Project Ideas
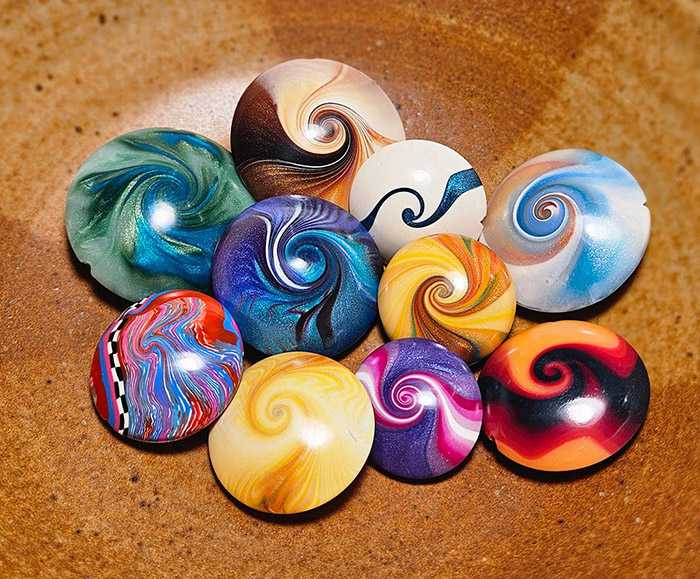
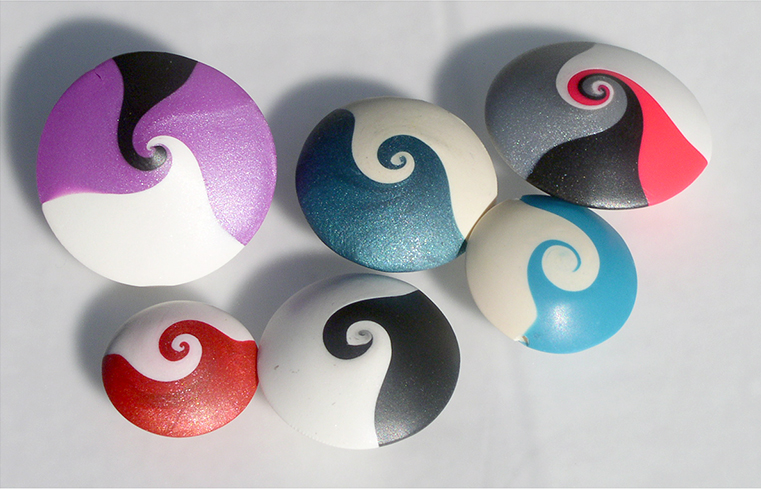
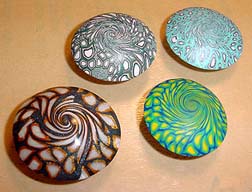
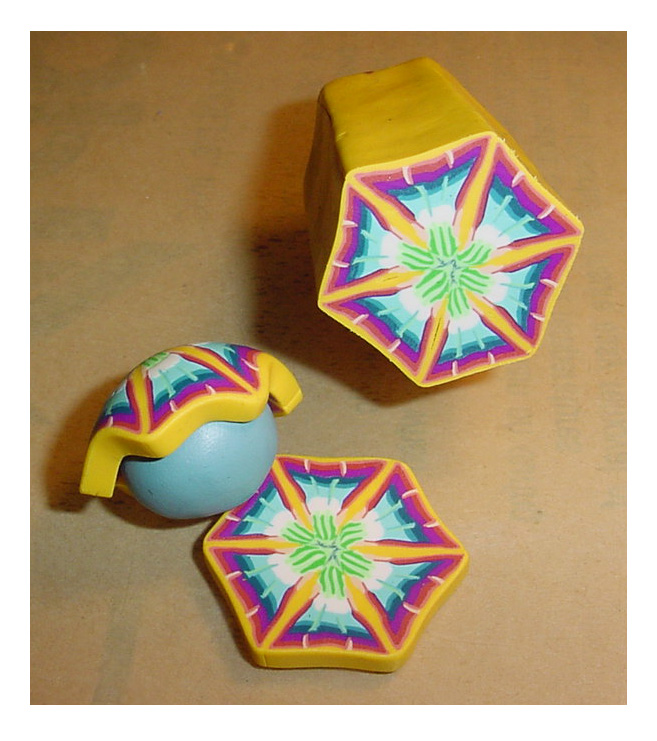
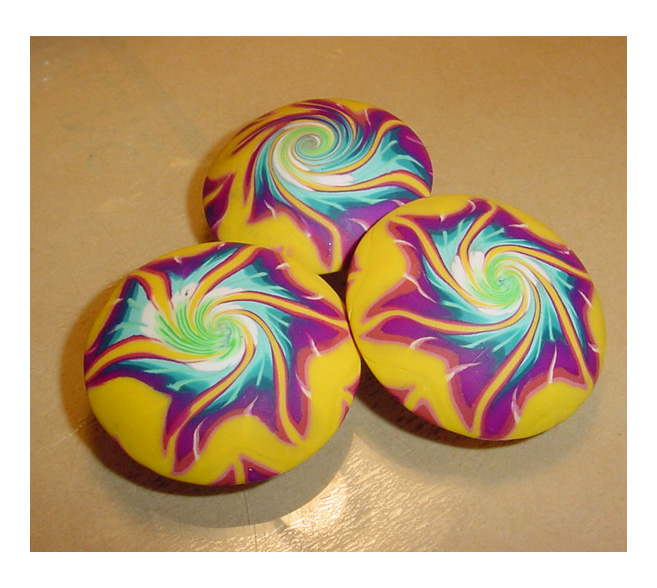
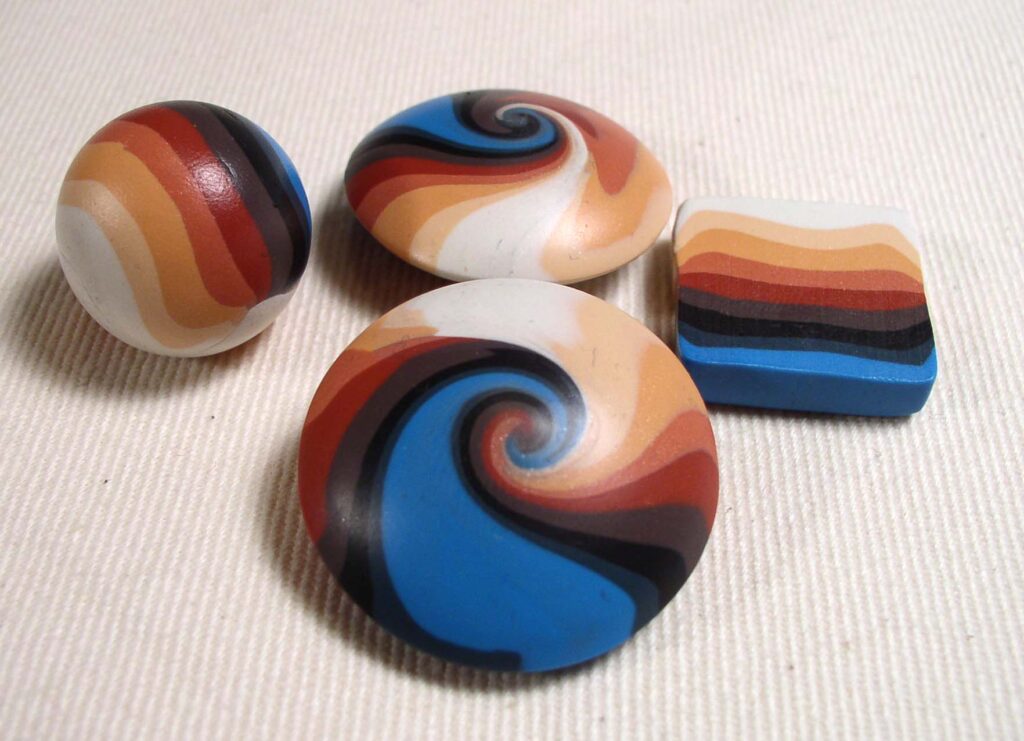
There are countless variations of patterns you can get with this technique. With a little creativity, you can keep busy giving yourself lots of pattern surprises. Here are a few methods you can try. Once you get going, I bet you can think up a few more. 😀
Half & Half

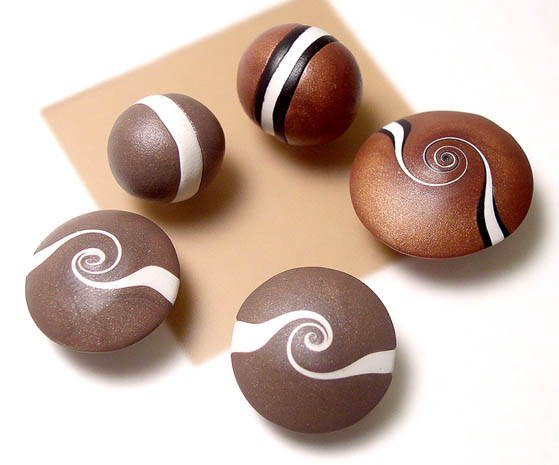

One important note regarding beads made from covering a scrap bead with slices. The bicone rotation will draw clay from the outer areas toward the center. This means eventually the edges will thin. That’s why I recommend you apply thick slices.


Originally produced: Jun 2009; last update: Feb 2025